
While you choose your Hearing Aids,
you will have two choices to make:
The style of your hearing aid
The level of technology of your hearing aid
The price will depend essentially on the technology you will choose rather than the style. The different technologies offer different sound quality as well as many options like directional microphones, noise reduction, wind noise management, feedback cancellation (whistling), automatic or manual telephone coils, etc.
The specialist will inform you of the different styles and technologies available, according to your hearing loss and your needs.
Style of Hearing Aids
Click on the images below to see how it looks like
IIC
Smallest custom-made hearing aid
Fits entirely into your ear canal
Cosmetic advantages
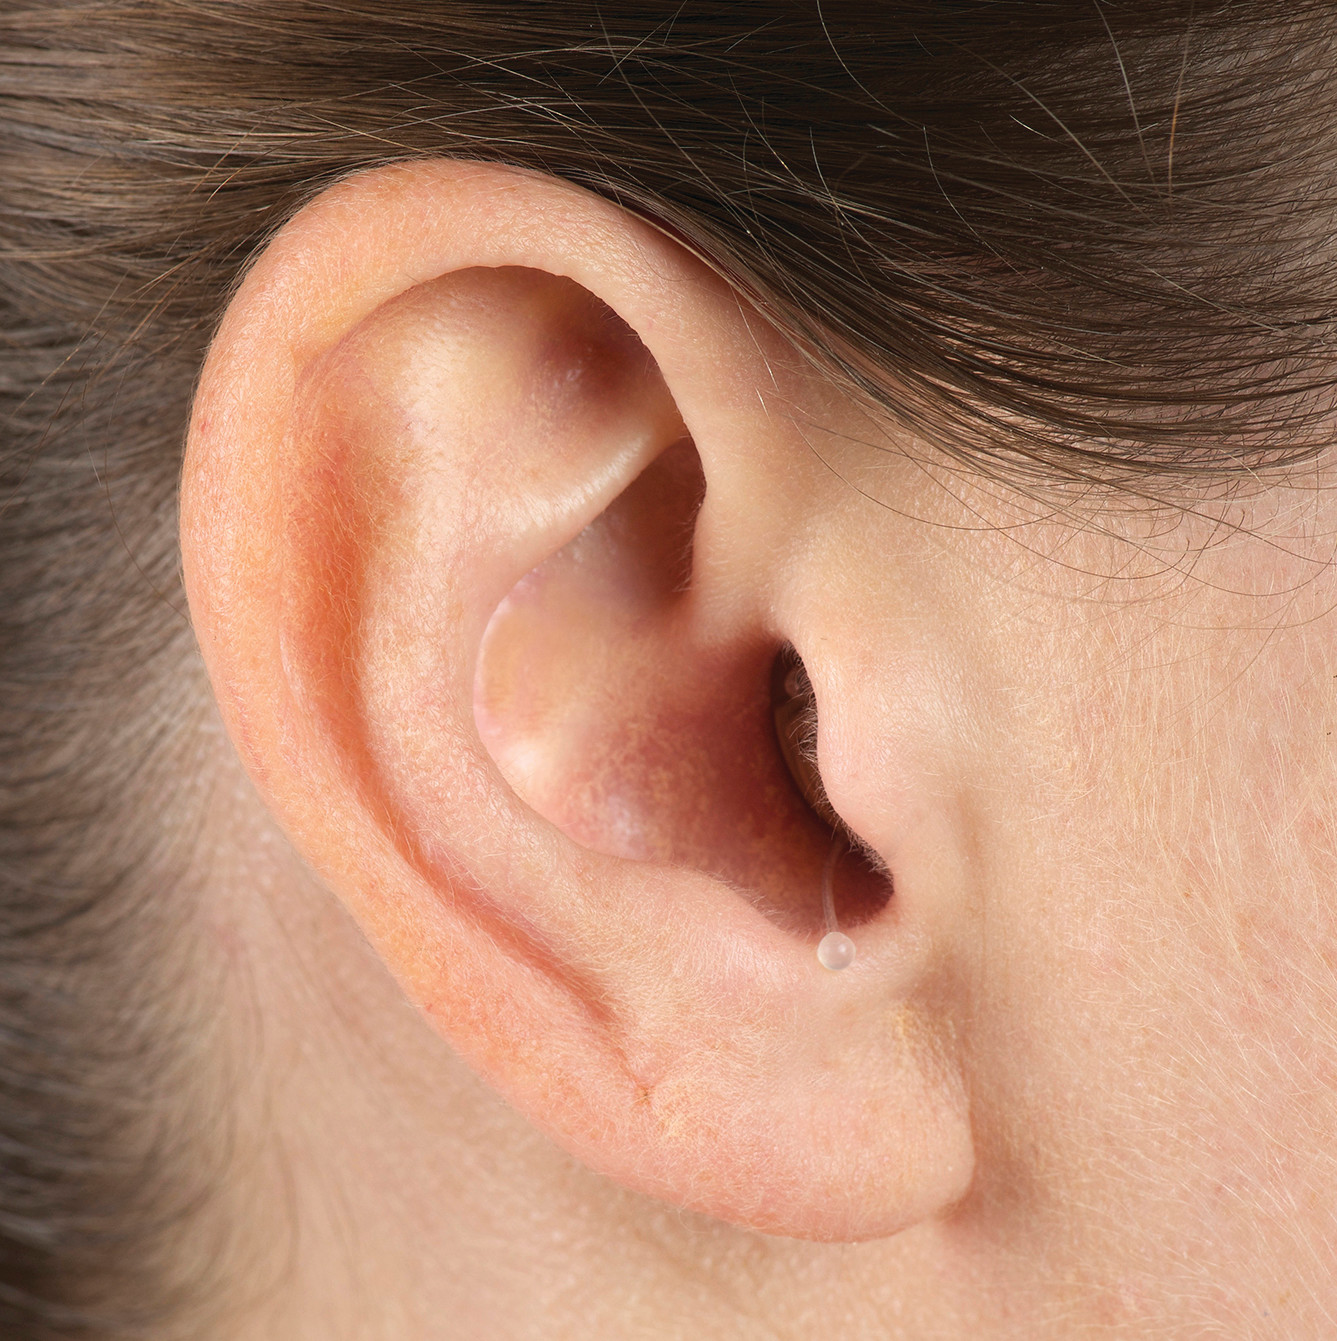
Completely in the Canal
Custom-made hearing aid
Fits entirely into your ear canal
Cosmetic advantages

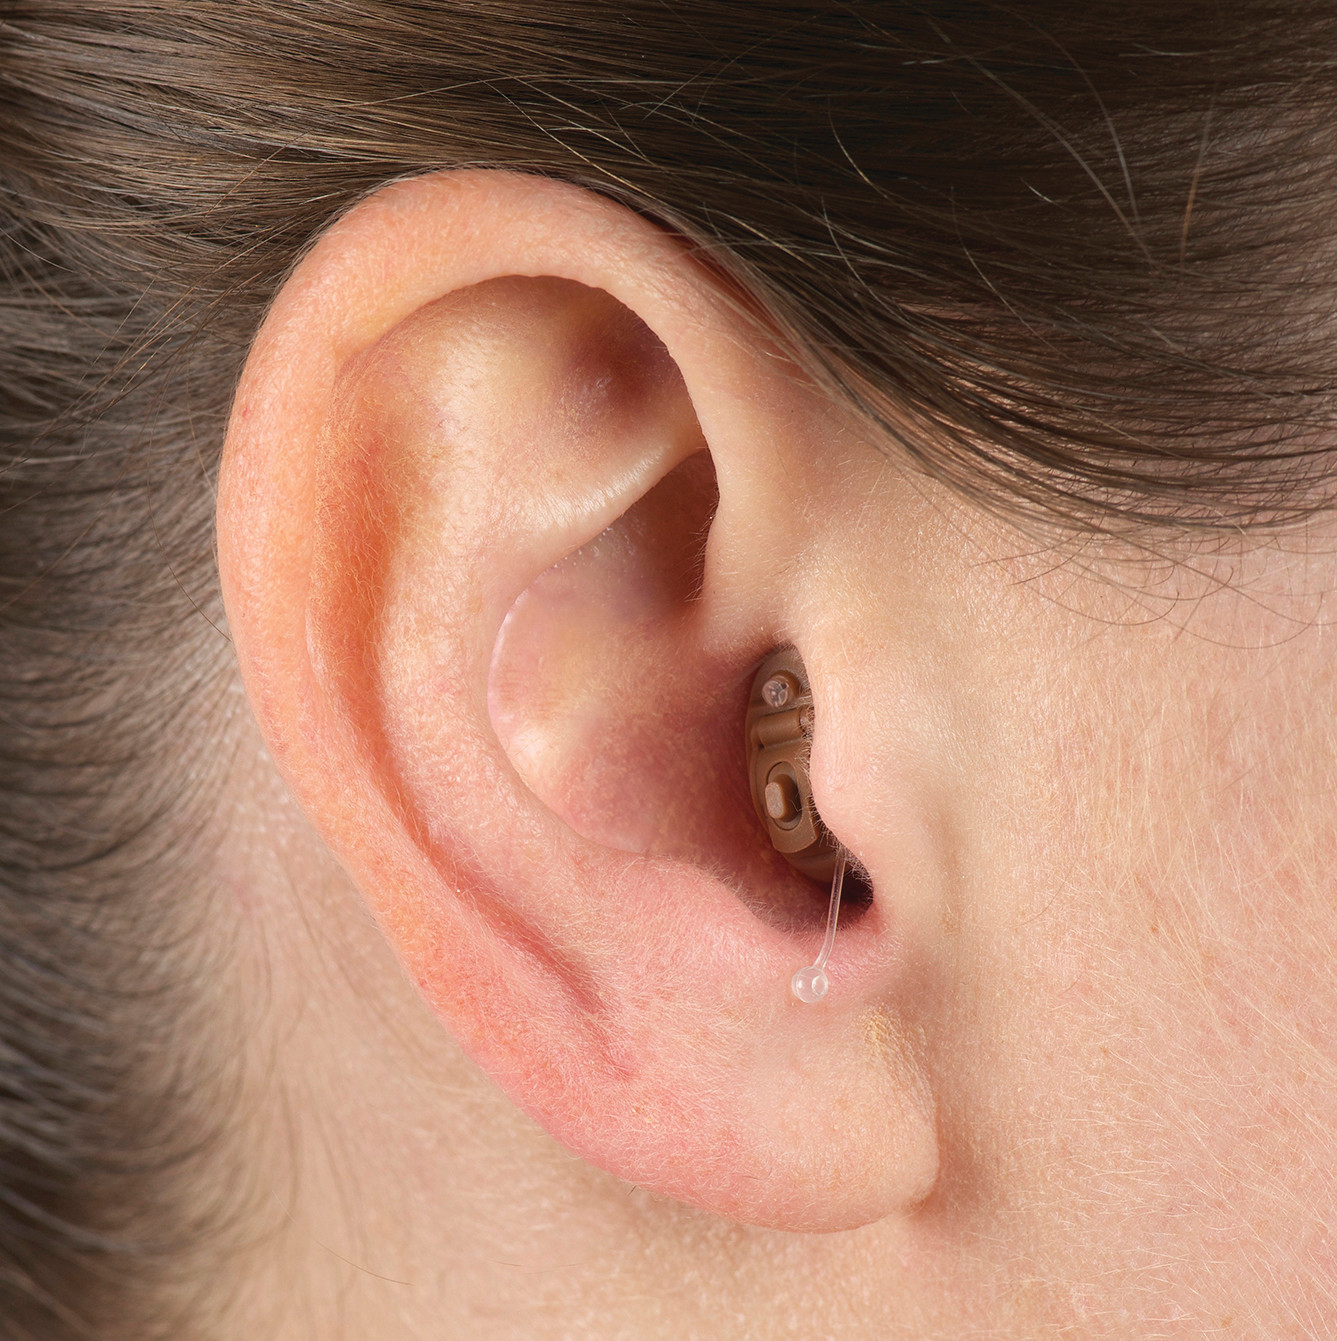
Canal/Half-Shell
Slightly at the opening of your ear canal, it fills half of your ear
Comfortable and easier to manipulate
More possible options (volume control, directional microphone, etc.)
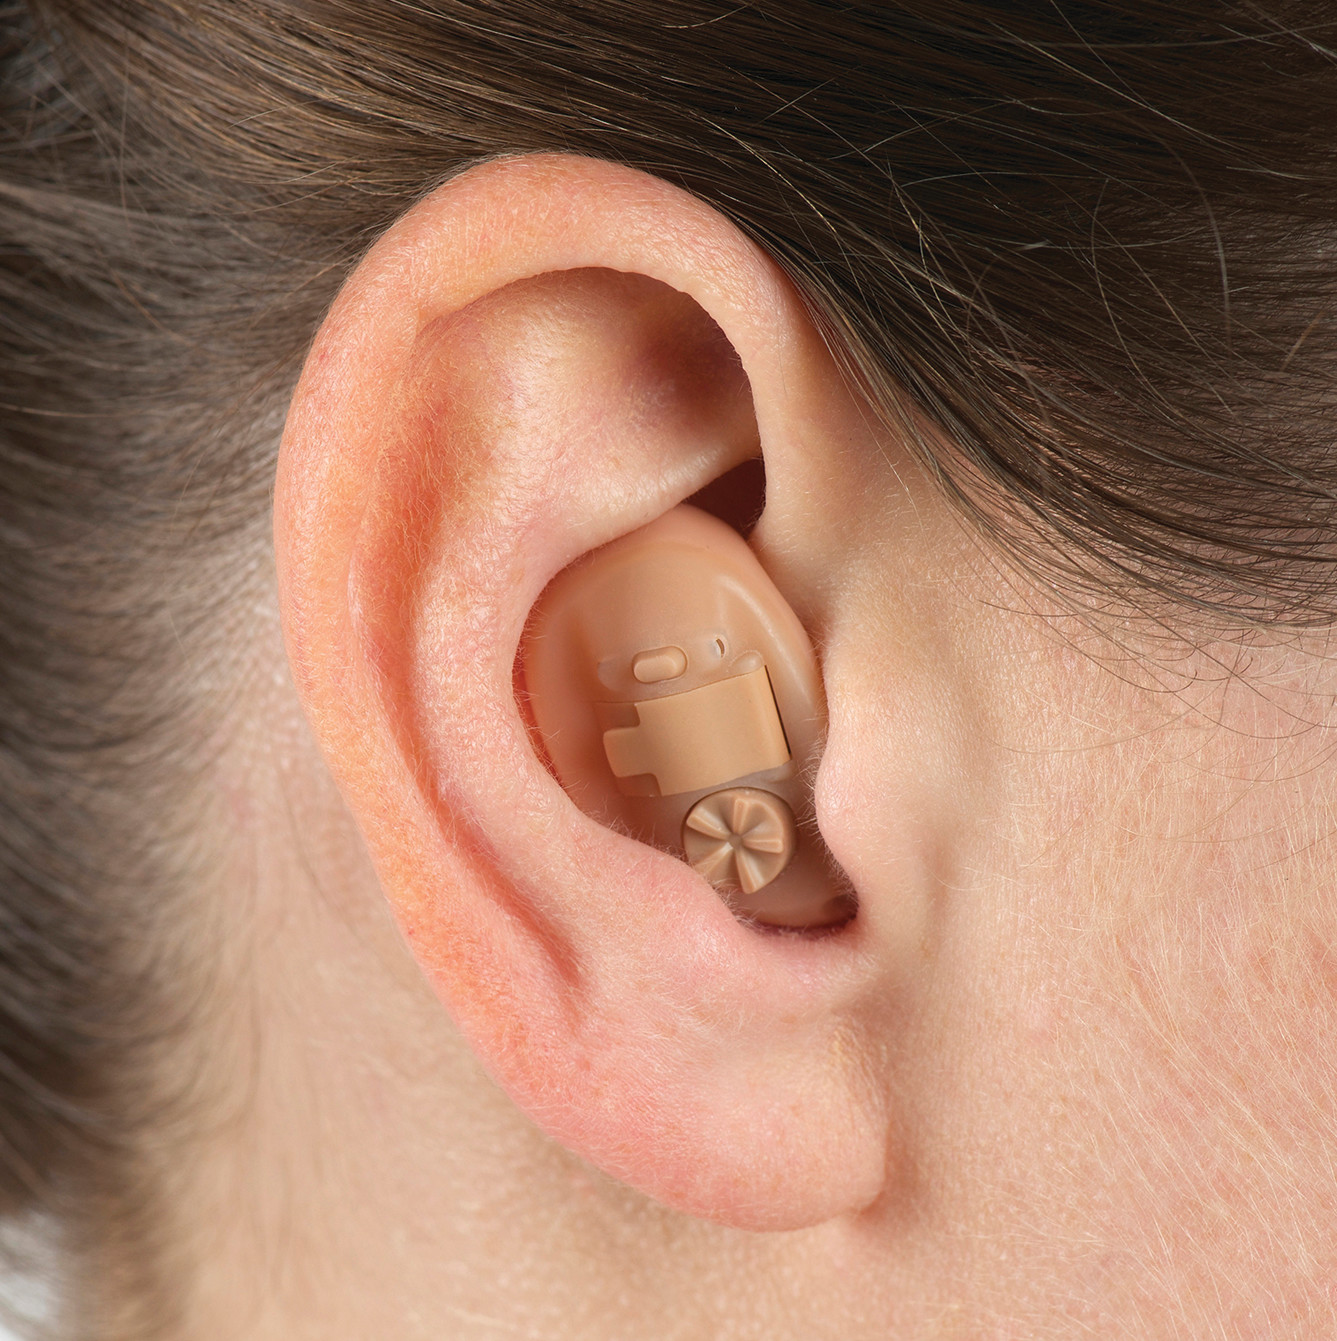
Full Shell
Fills the bowl of the ear
All options possible
More powerful
Longer battery life
Behind the ear
Aid worn on the ear with tube connecting to ear canal
Many colours available
Can be used for mild to profound hearing loss

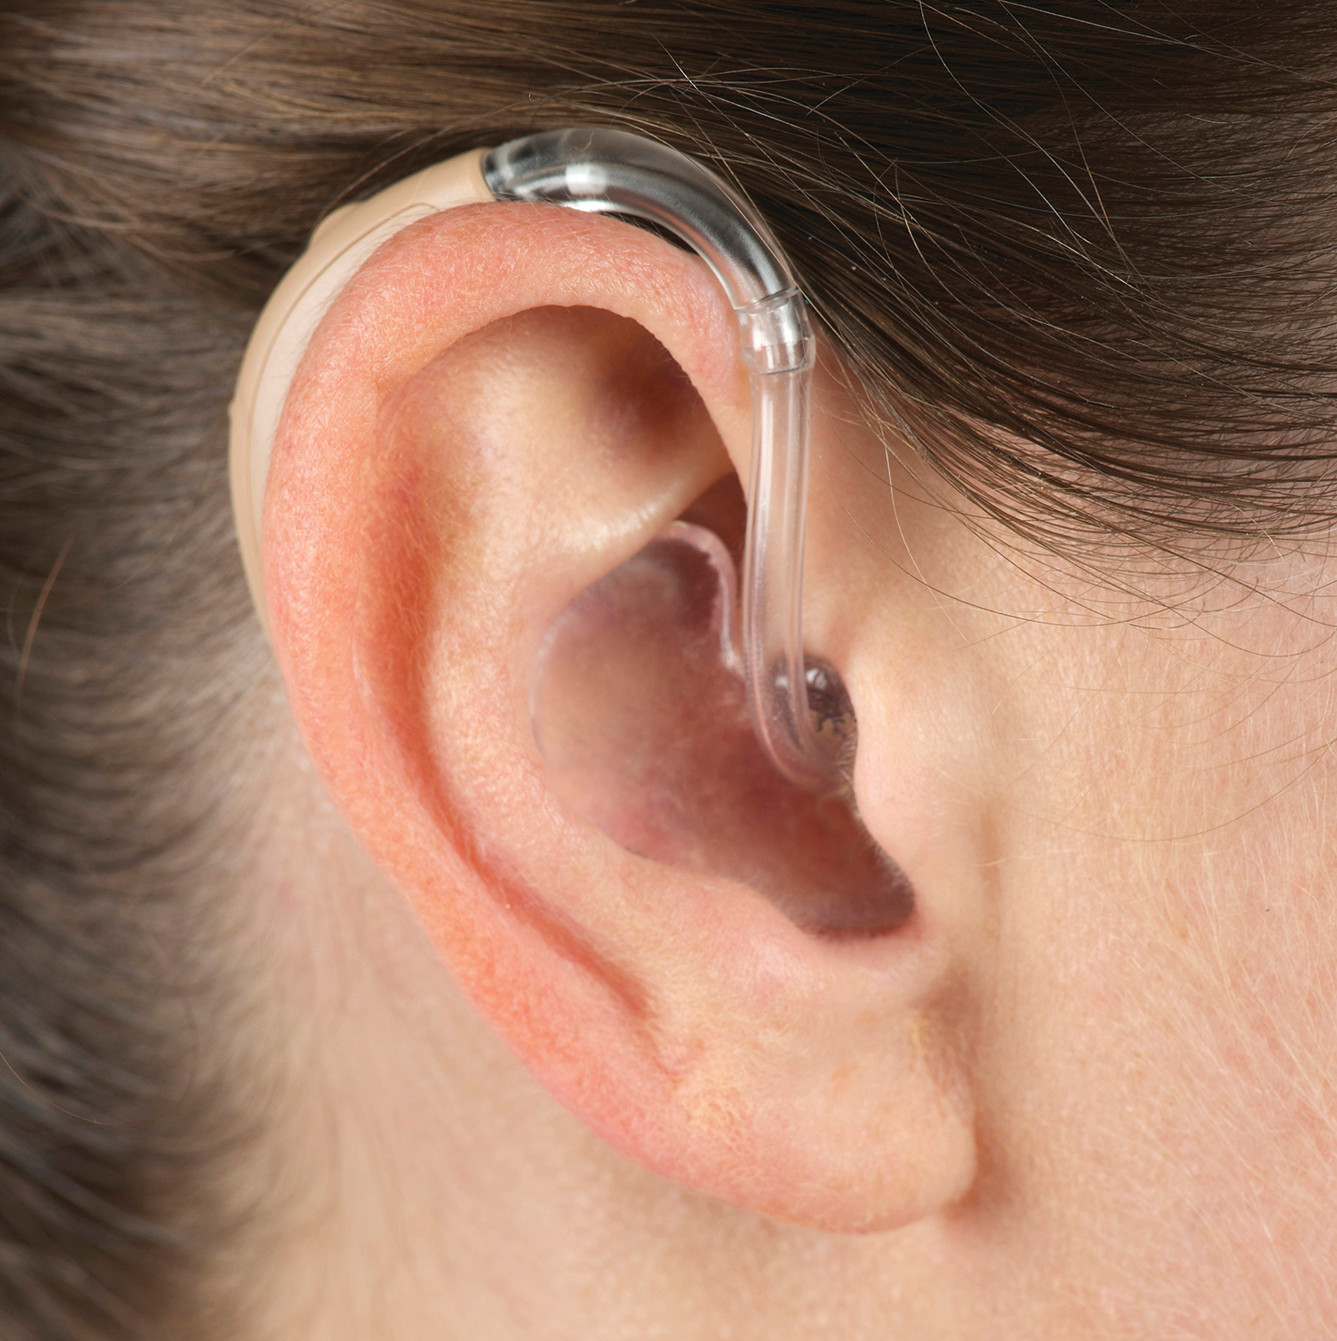
Receiver in canal
Aid worn on the ear with fine tube connecting to ear canal
Smaller and more discreet compared to traditional behind the ear
Only available for specific hearing losses
Ear Canal Impression
The ear impression is a ”cast” of the ear and the foundation for all custom devices. It is crucial to obtain a good-quality ear impression. Any deficiencies in the ear impression may result in a poor-fitting custom ear piece and can negatively impact the patient experience.
A good impression will consist of a canal length 2 to 4 millimeters beyond the second bend. The helix, concha bowl and ear canal should be completely filled and smooth. There should be no gaps or imperfections in the impression.

Step 1
We start with a visualization of the external auditory canal to ensure there is no obstruction due to earwax accumulation.

Step 2
An Otobloc blocker is inserted into the ear canal to protect the eardrum during the imprint process.

Step 3
The silicone material is then injected into the ear.

Step 4
This last picture shows a full mold.
Real Ear Mesurement
The sound tests help ensure that their frequencies are amplified by the specific needs of the user.

Step 1
A microphone is inserted into the ear canal to capture the frequencies emitted by the prosthesis.

Step 2
The hearing aid is then attached to the microphone in order to measure the noise level specified. The microphone (clear tube) picks up sound and transmits the results to a specialized software that translates the sound into a graph.

Step 3
The audiologist then explains the test results to the patient and if needed, the necessary adjustments to ensure optimal performance of the prosthesis.